The deployment and initialization of the database are restricted to system administrators via the Settings tab.
Account/Agency detail:
Select the Settings icon from the left-hand navigation menu.
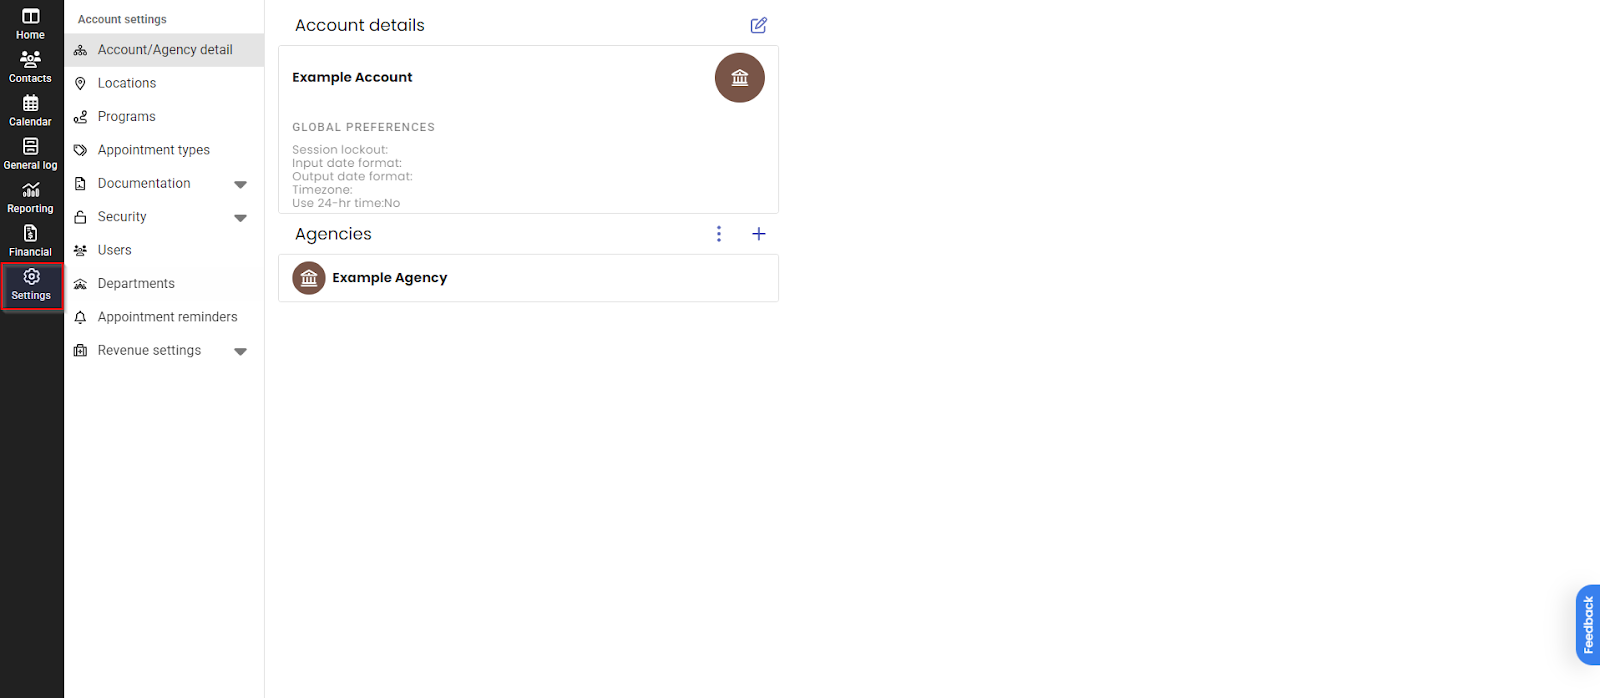
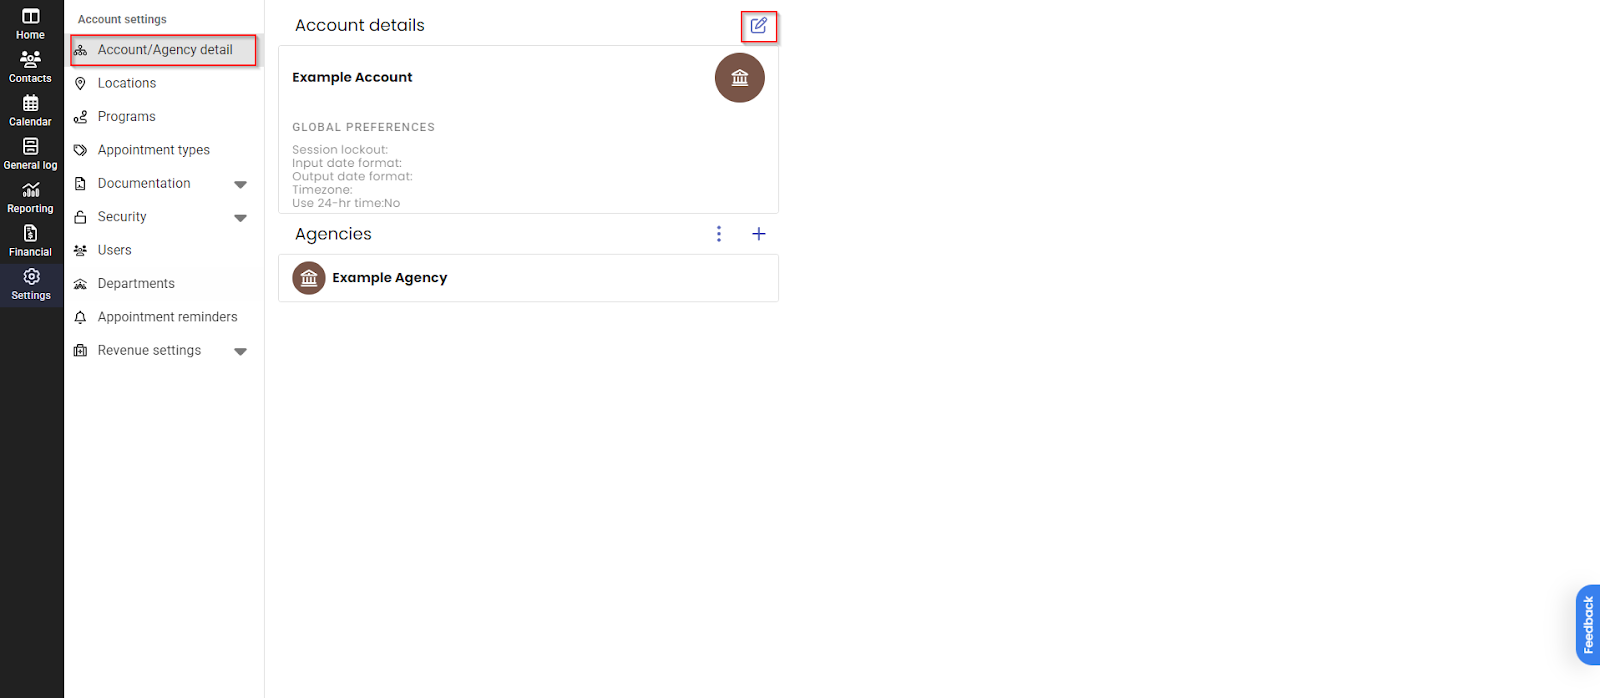
Select the Account/Agency Detail tab. Here, you can edit your account details by selecting the edit icon.
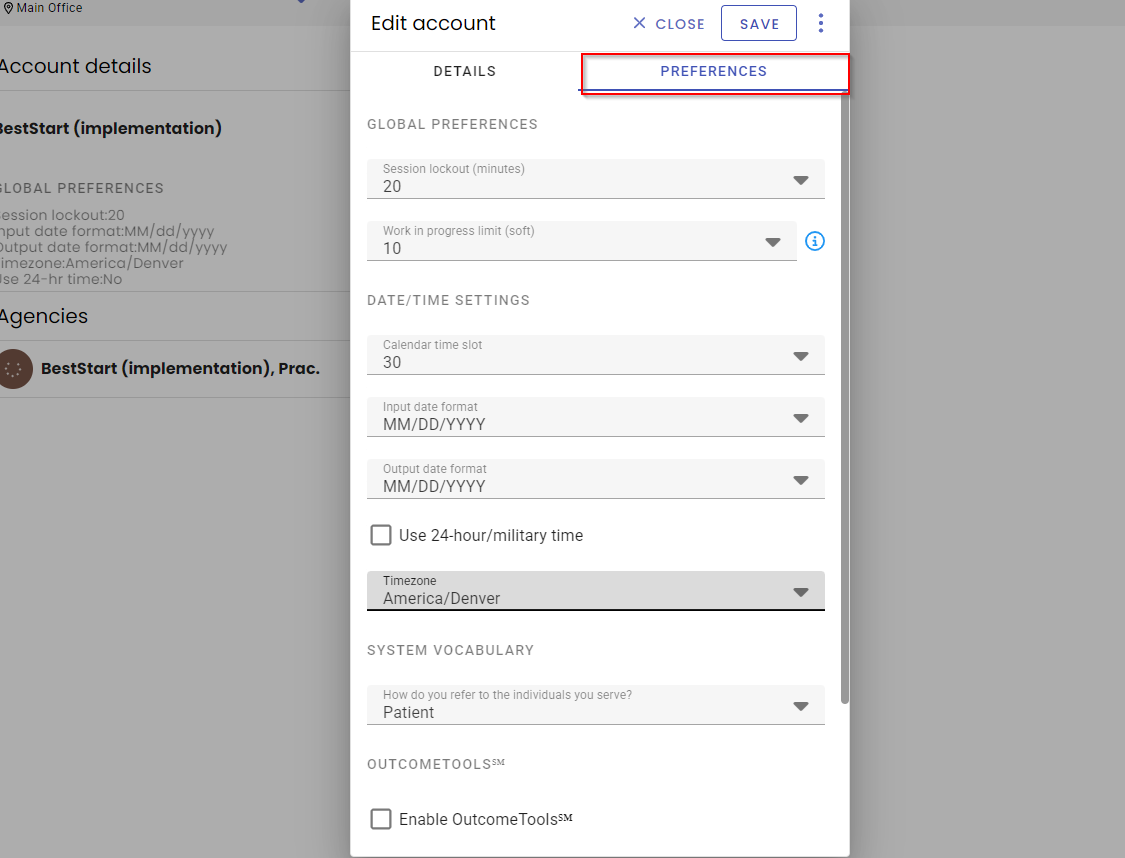
In the Edit Account window, under the details tab you can add information like your company's website, phone, address and more.

Use the Preferences tab to edit features such as screen lock, date & time settings, and to specify database vocabulary.
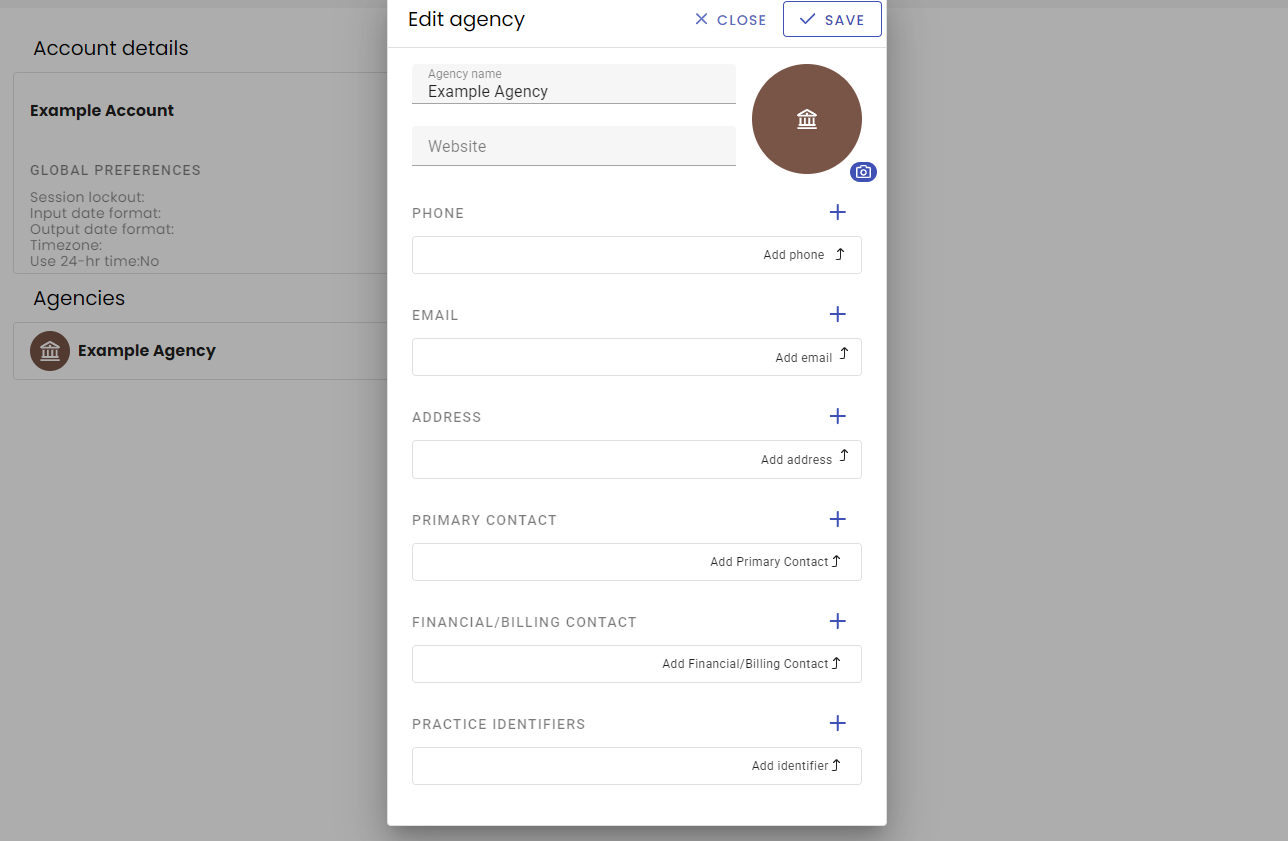
Within the Account/Agency detail tab, you can edit agency details by selecting the agency name. An Agency represents an overarching organization that can manage one or several individual locations.
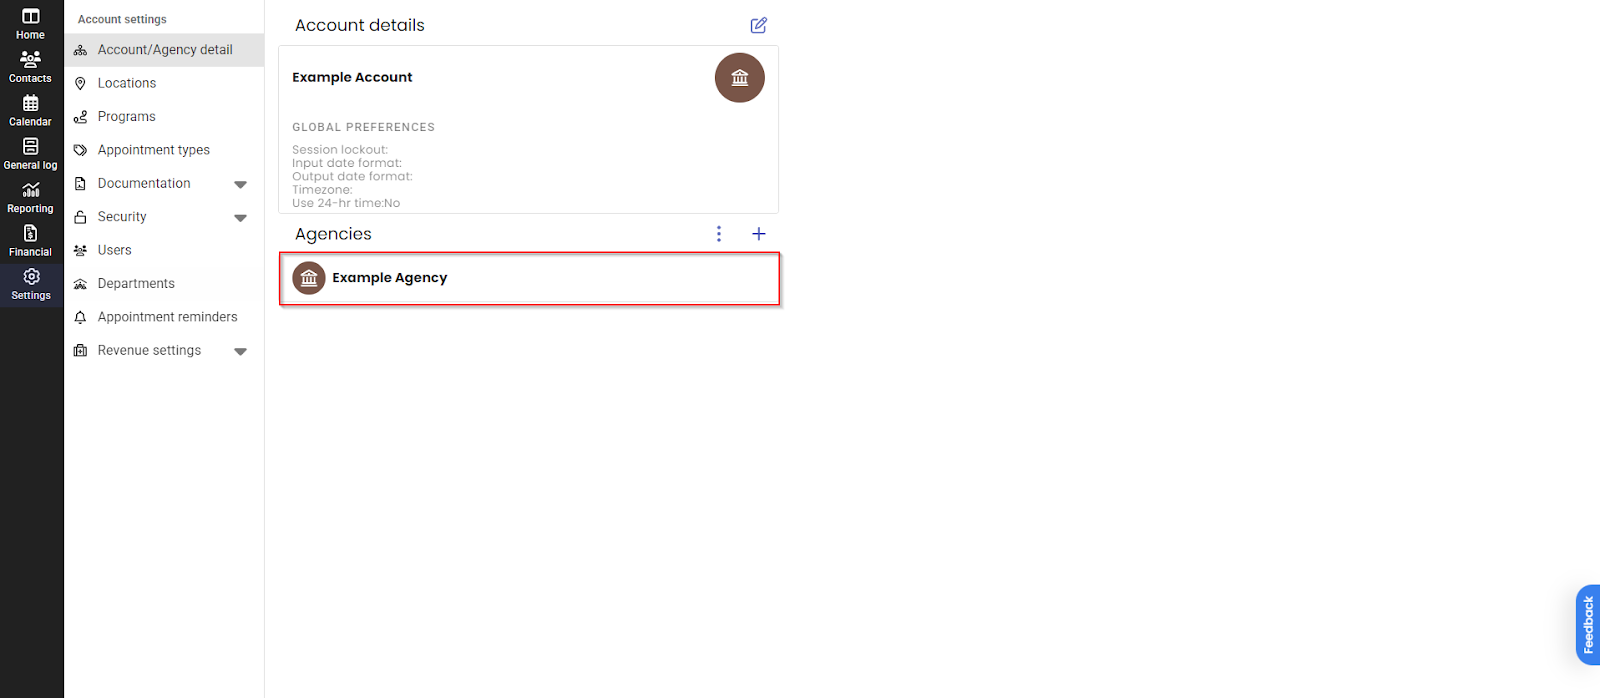
Selecting your agency allows you to add agency-specific details, mirroring the structure of the main account information. The bottom area of this screen is dedicated to adding your agency's Practice Identifiers.
Locations:
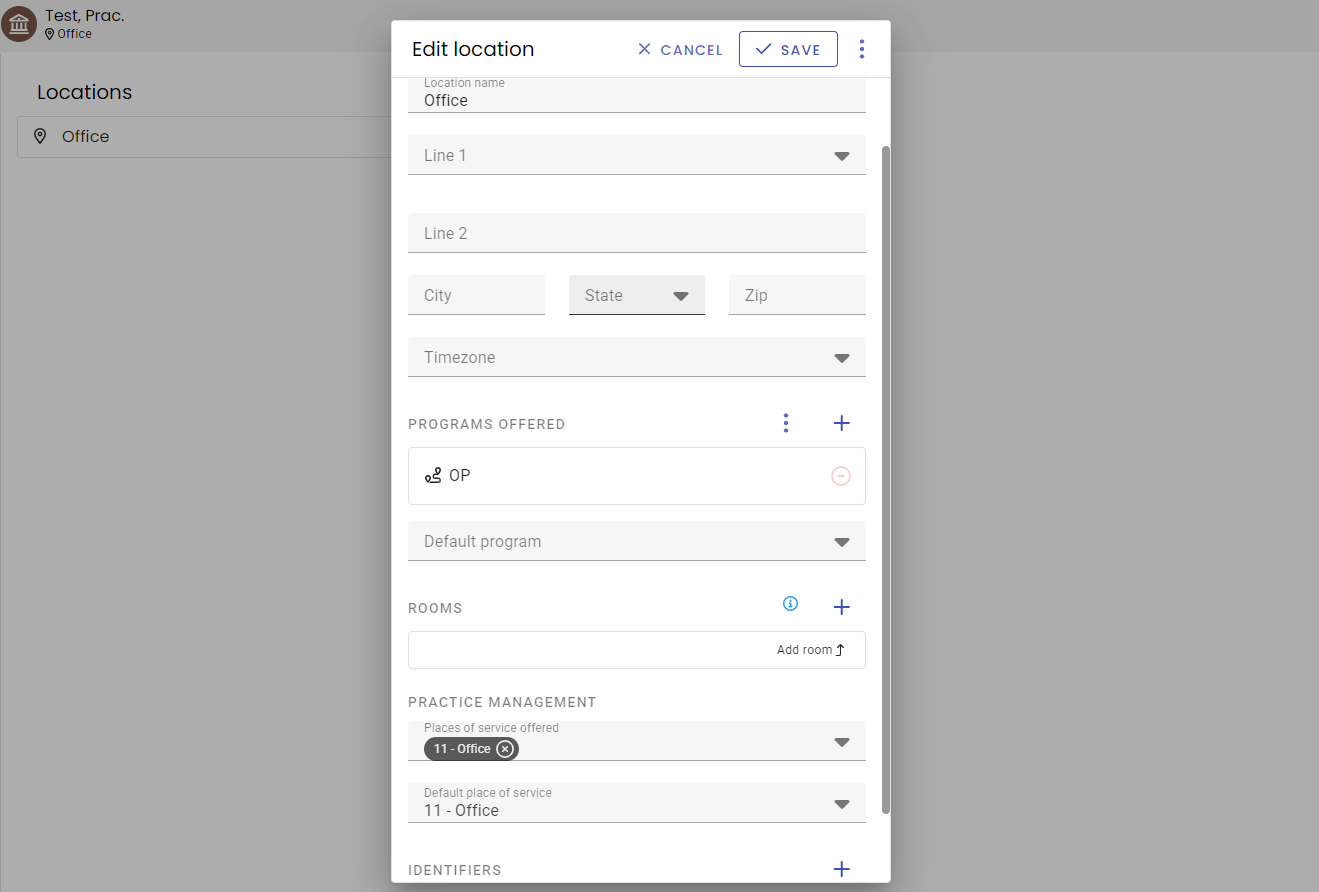
The Locations tab in the settings will provide a way to track where your services will be provided. To add a new location you can select the Plus Icon located above the locations list. To edit an existing location, select the location’s name.

Adding or editing a location will allow you to identify the location’s address, timezone, associated programs, and more. Identifiers specific to the location, such as location NPI and State Licensing, can be entered at the bottom of the add or edit screen.
Appointment Types:
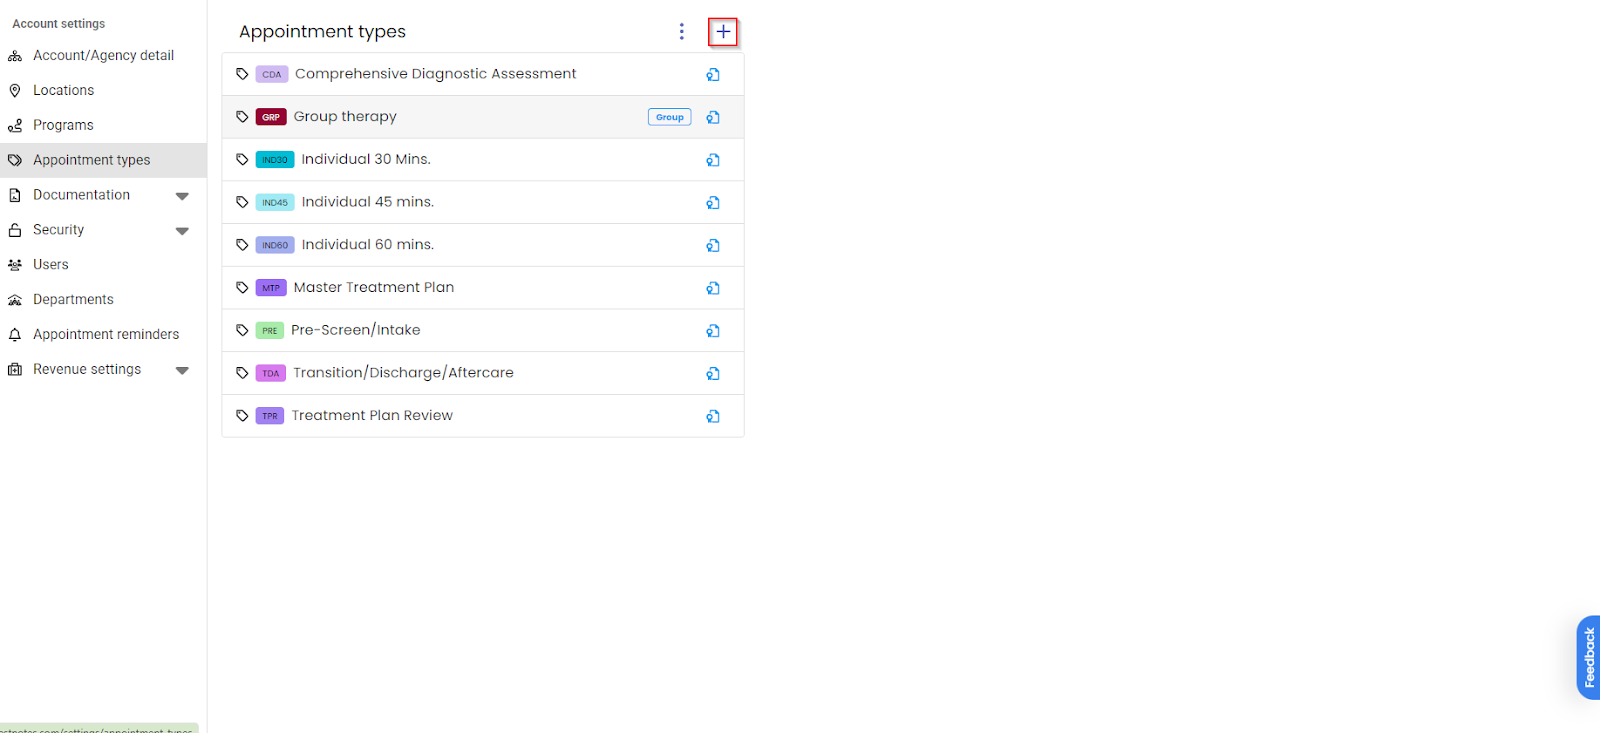
In the Appointment Types tab, you can customize appointment types by adding default templates, procedure codes, and appointment duration times. These will be available to be selected and used when booking appointments for patients and allow for easy scheduling, notating and billing all at once.
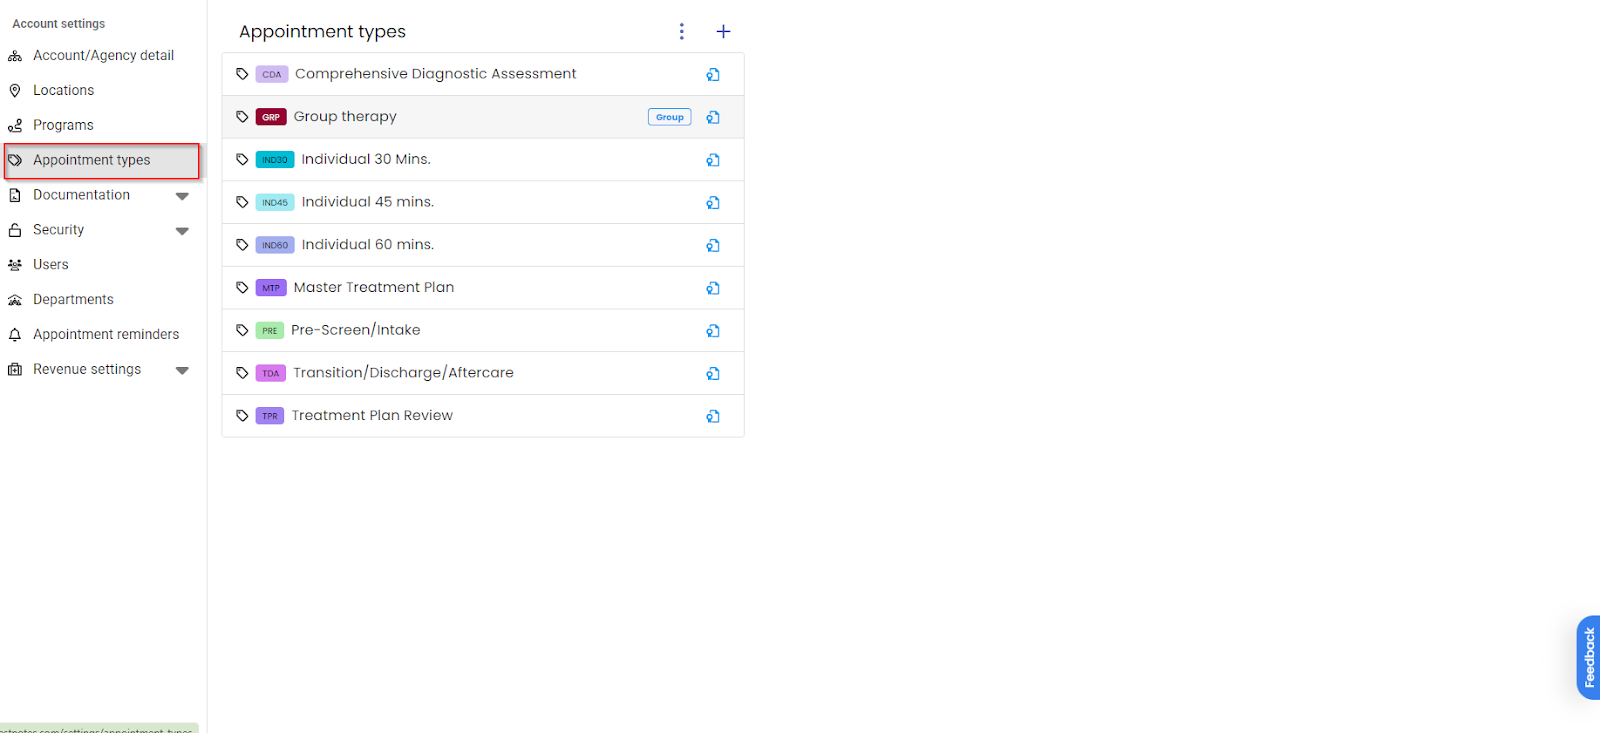
To edit an existing appointment type you can do so by selecting its name. To create a new appointment type, use the Plus icon located above the Appointment types list.
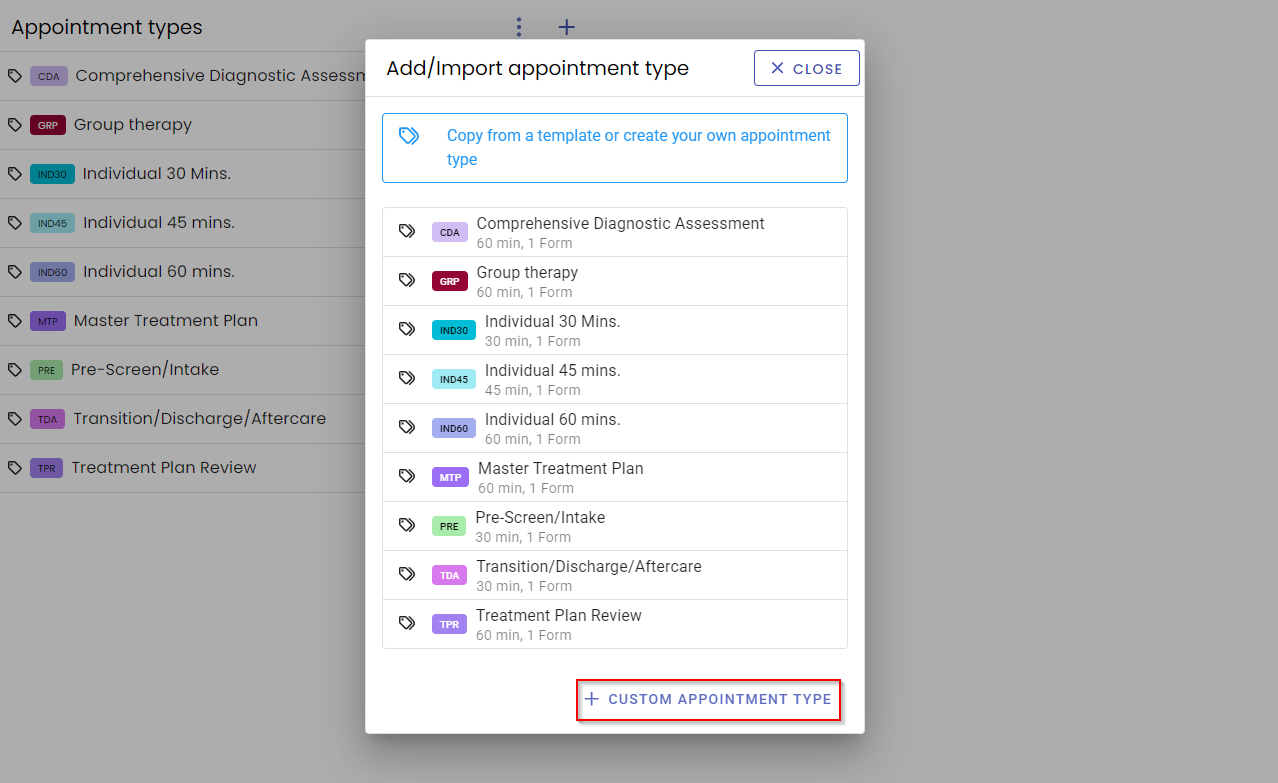
Select the Custom Appointment Type located at the bottom of the new screen.
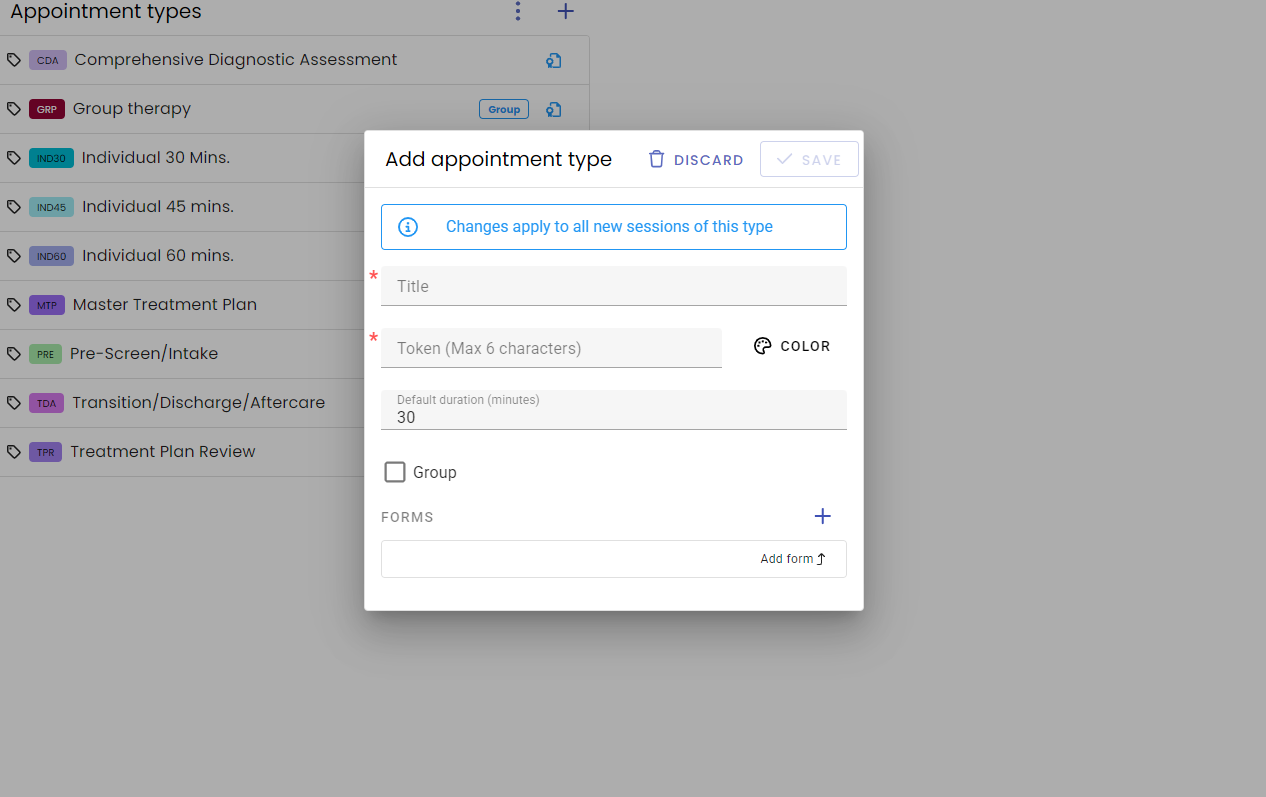
Add a title, office token, and connect forms to your appointment.
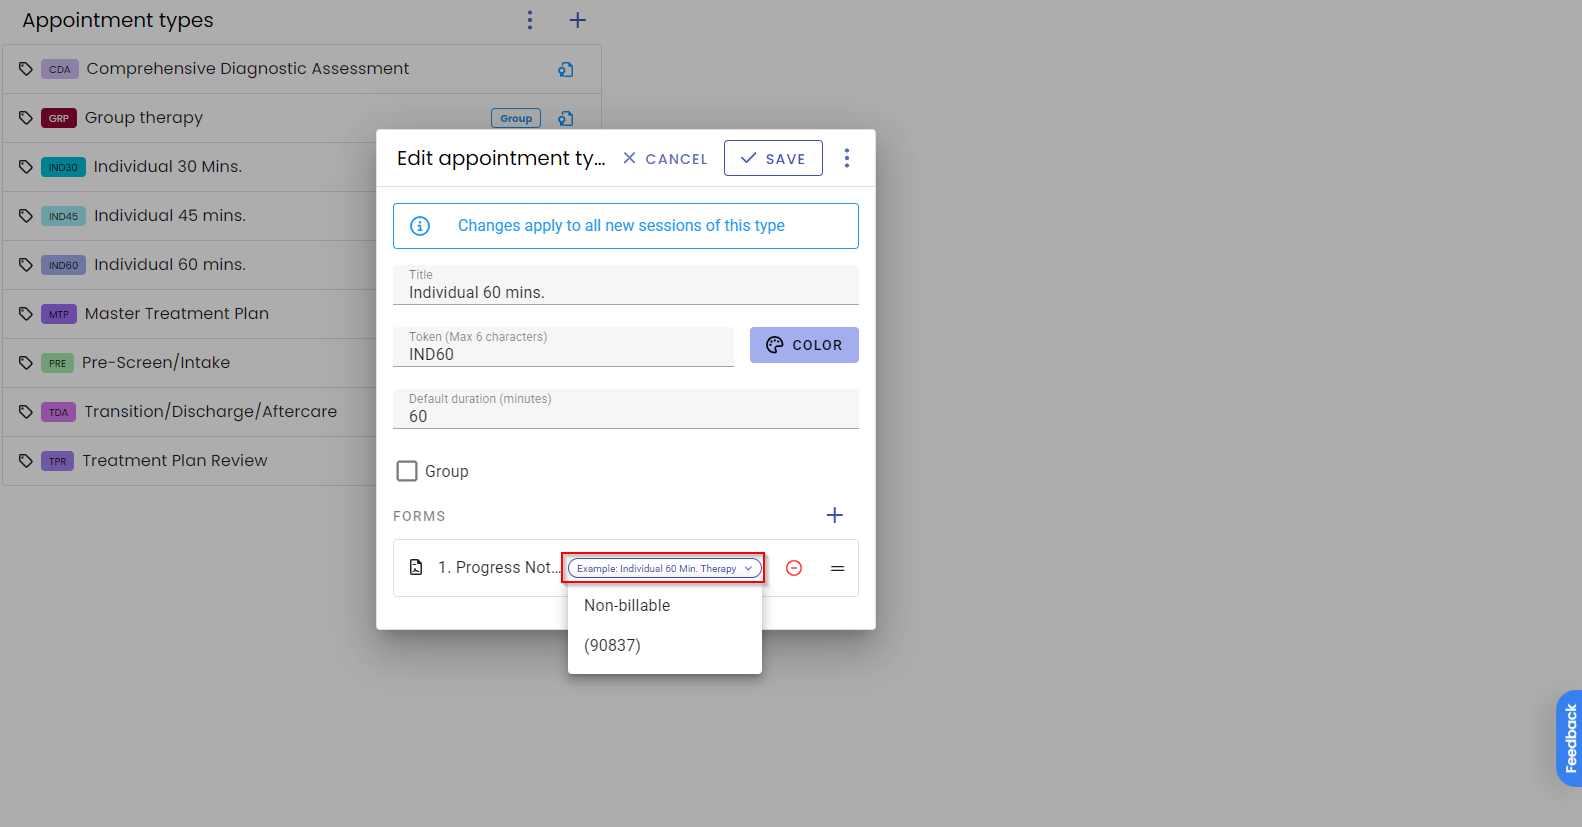
Once a form is selected, you can assign a procedure code to the form. These will need to be programmed in your Revenue Settings first.
Programs:
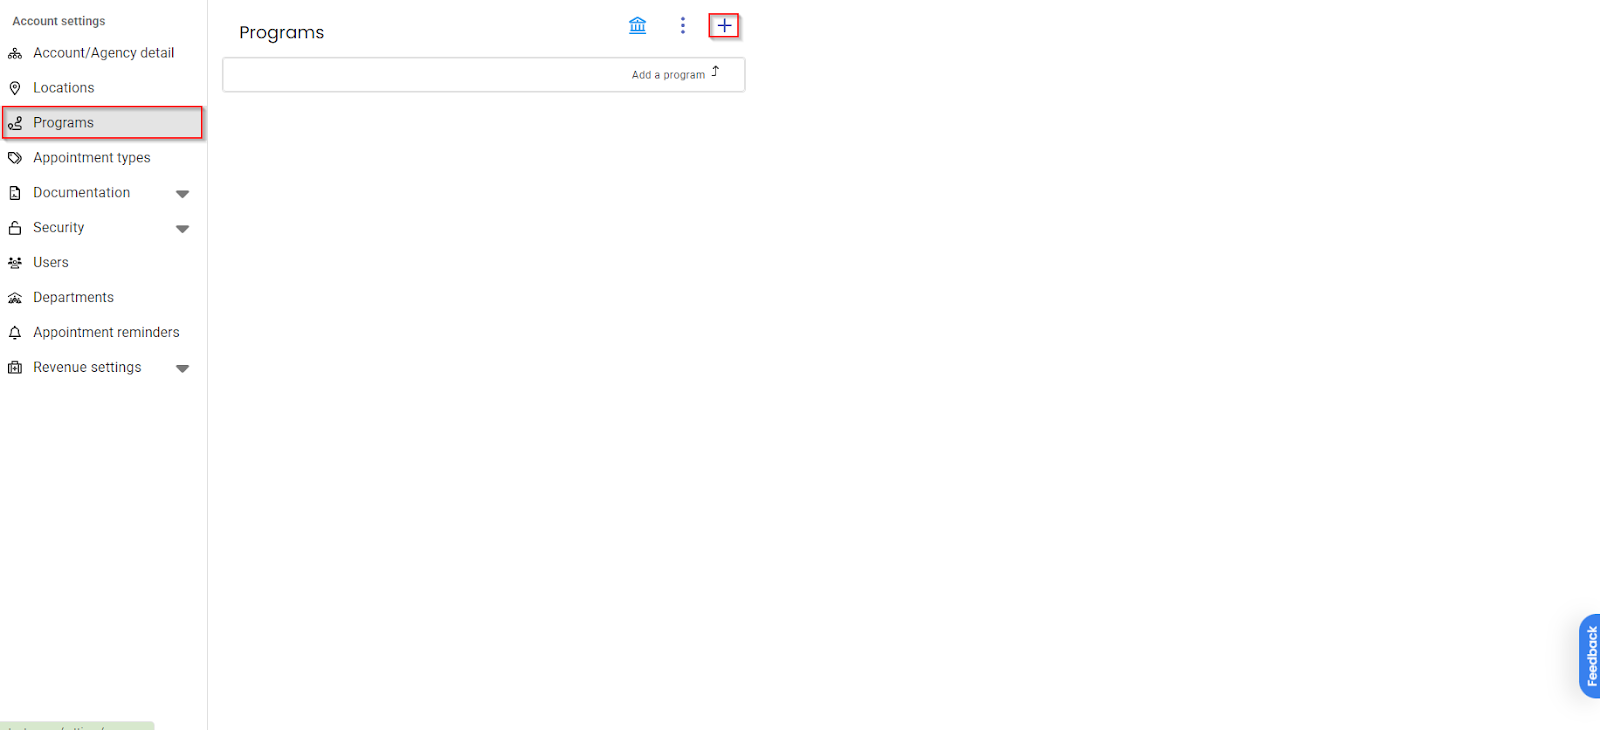
In the Programs tab you can add and manage the programs that you offer.
To edit an existing program, click the program name as it appears in the program list.
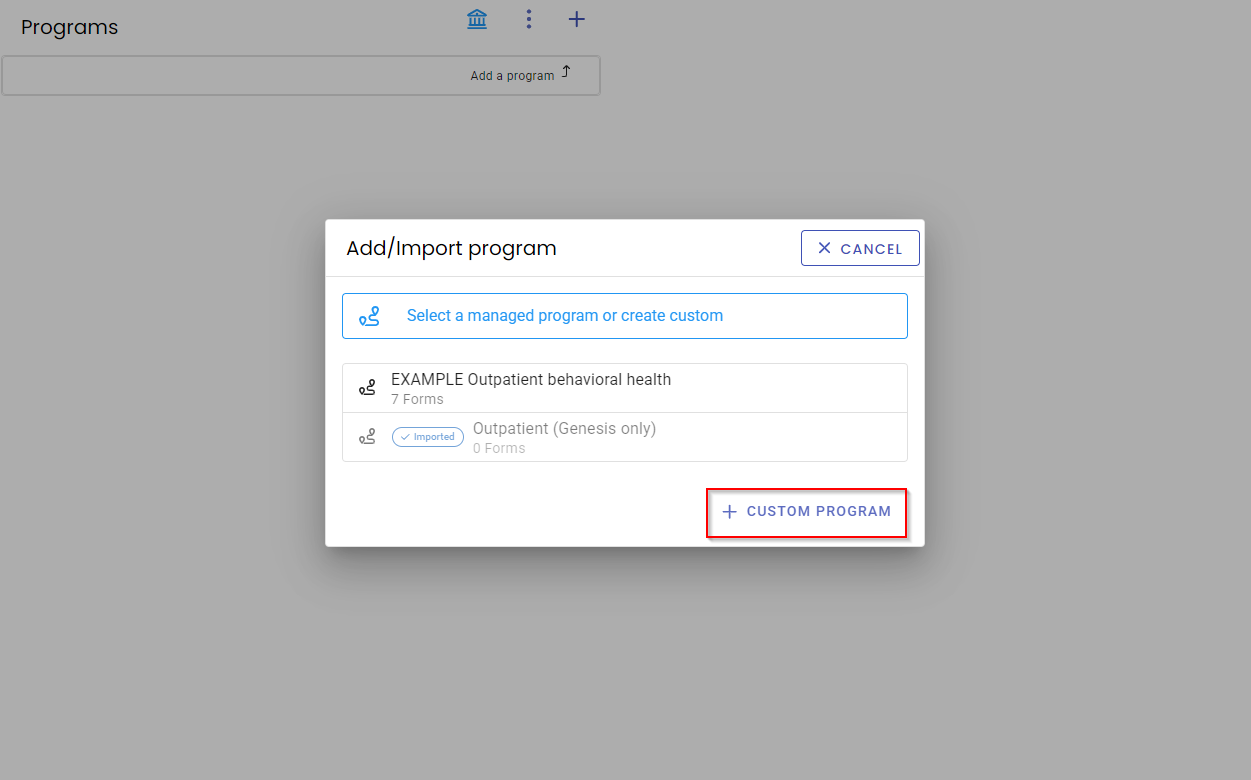
To add a program, use the Plus Icon.
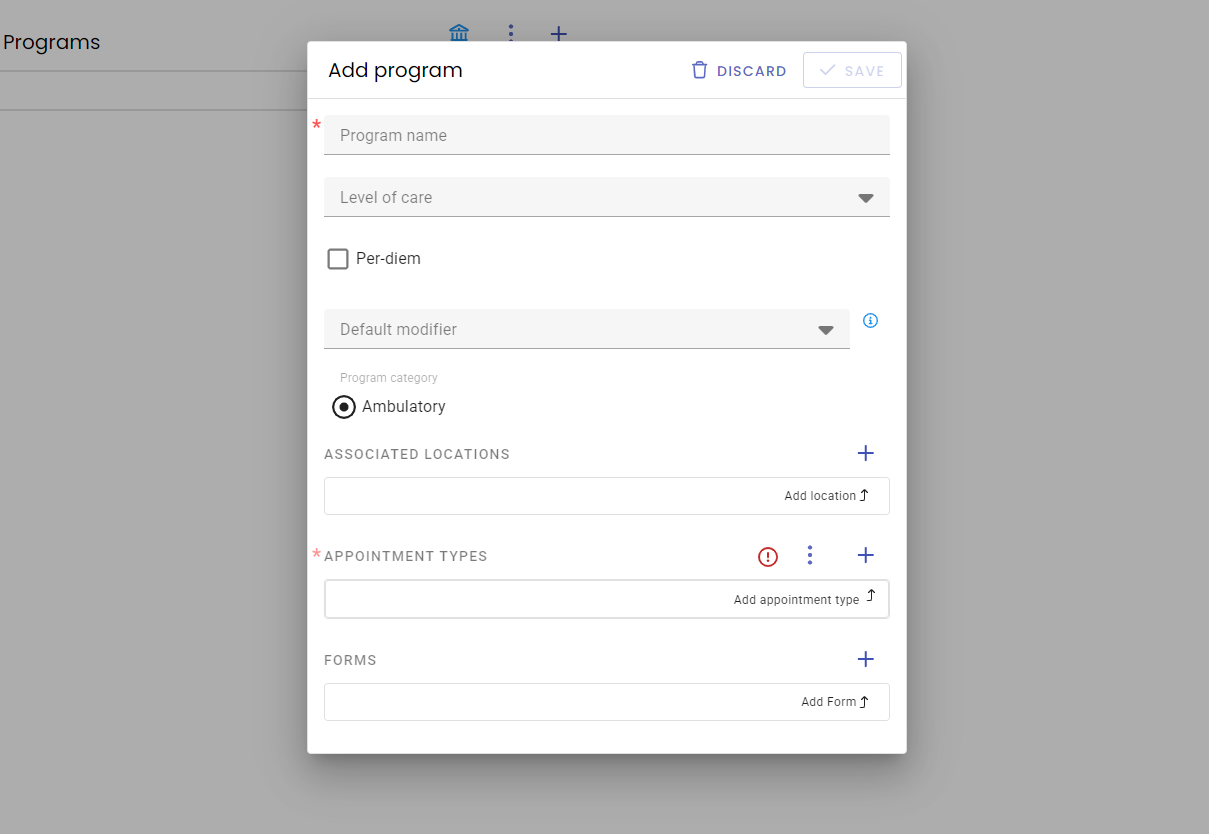
Once selected, choose + Custom Program from the bottom corner of the screen.
You can set a specific level of care, add Appointment Types, or associate new Forms with this program. When finished, select Save to add the new program.
Documentation:
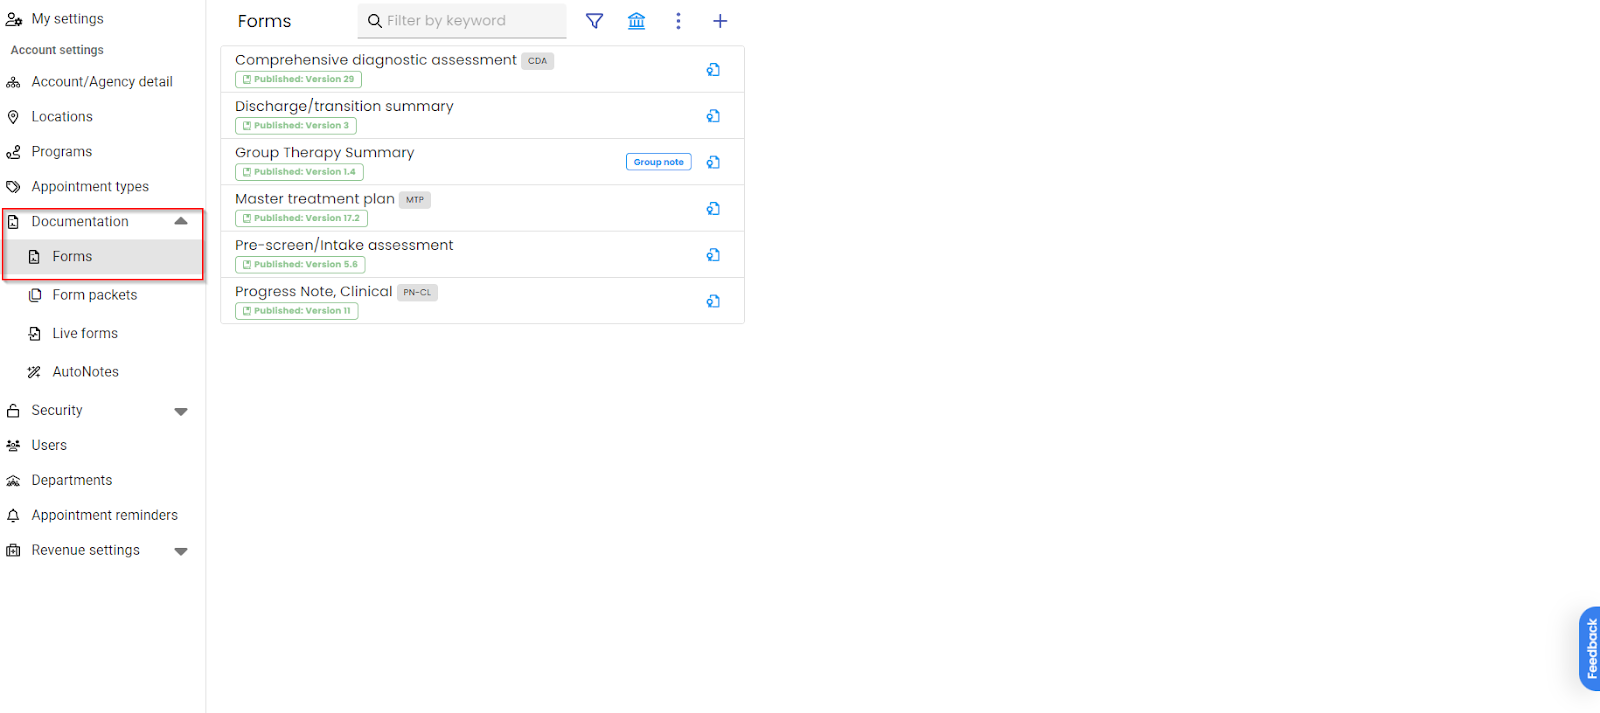
Within the Documentation tab, the Forms tab will allow you to manage and view the documentation in your database. You can choose from a list of pre-built forms or create your own custom forms by selecting the Plus icon. You can also request certain forms to be built into your account by our Content Support Team by emailing team@bestnotes.com.
Forms:
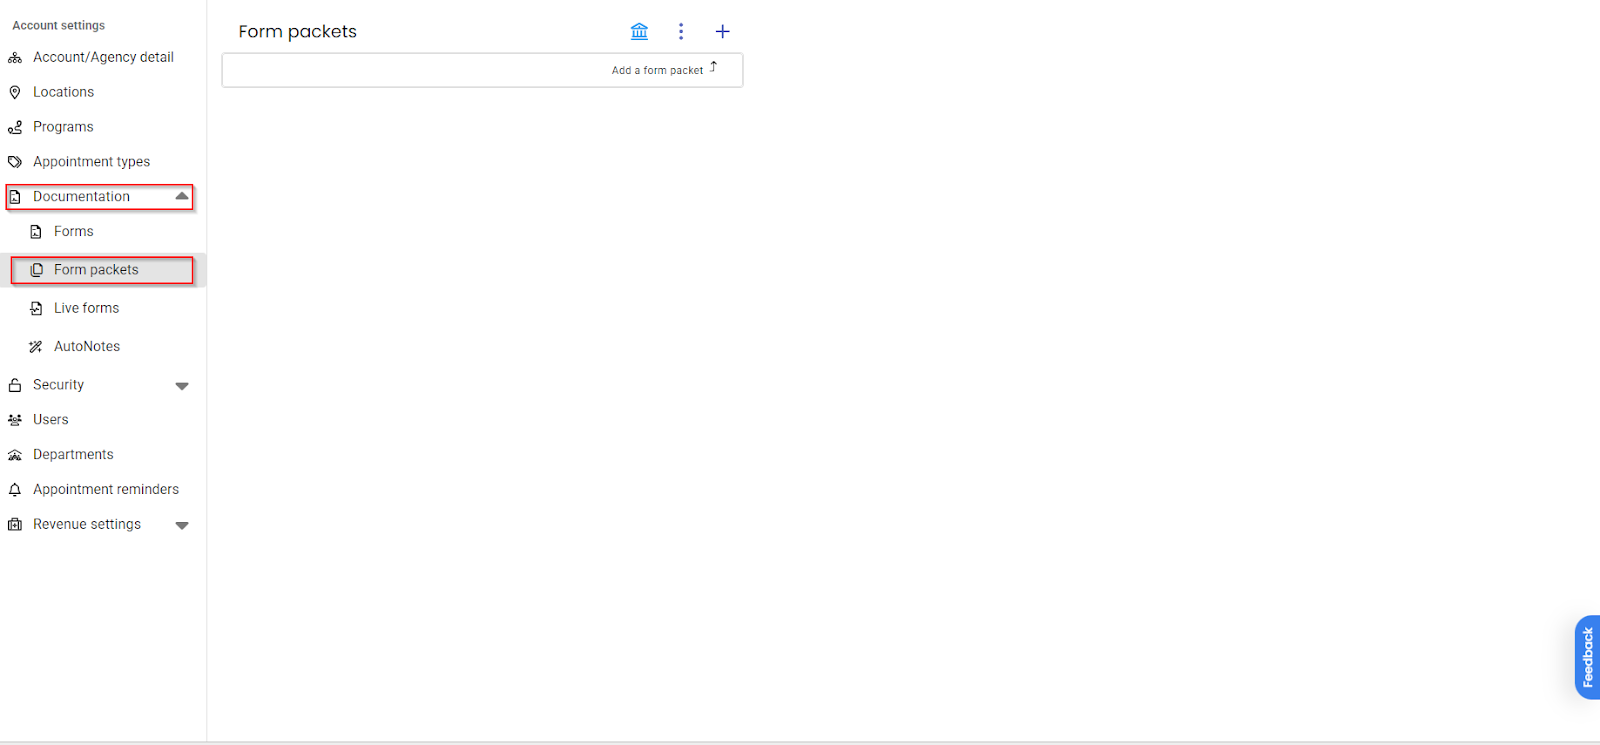
Form Packets:
In the Documentation tab, Form Packets will allow you to create custom packets which can be sent to the patient’s portal.
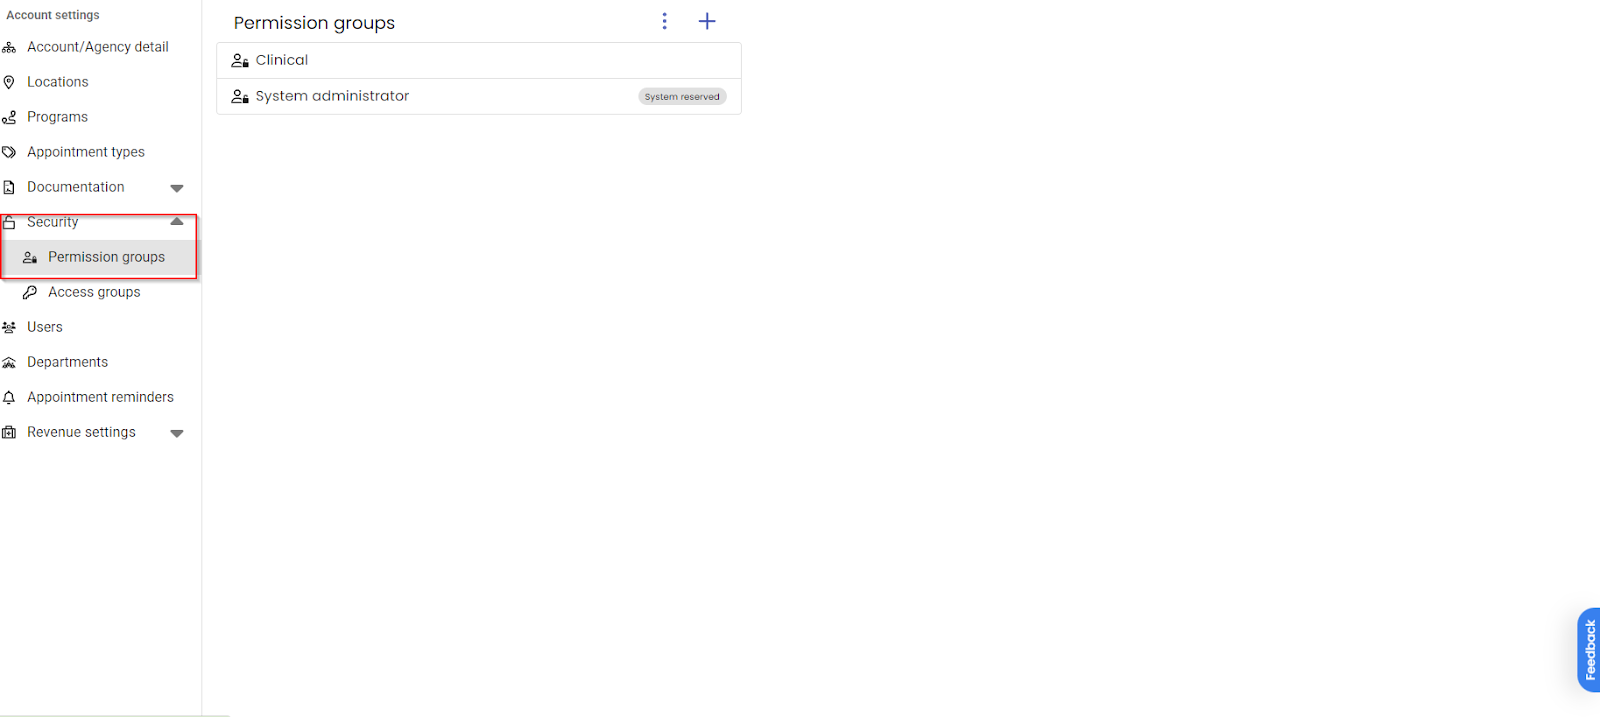
Permission Groups:
In the Security tab, the Permission Groups tab allows you to manage the permissions associated with specific groups. Select any existing group to edit its permissions or use the Plus icon to create a new permission group.
When editing or adding a permission group, the Details tab shows a list of individual permissions under each drop down category. These permissions will dictate what a user can do in their account.
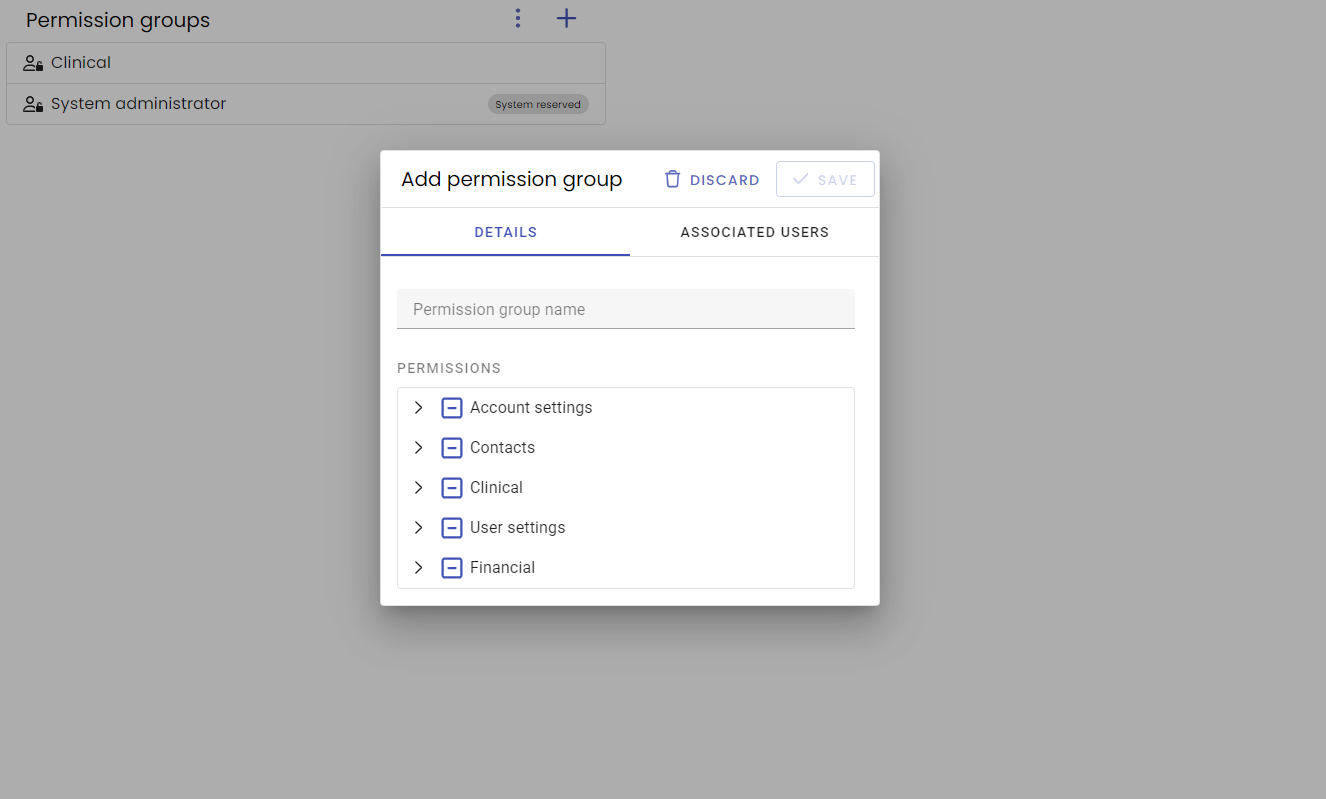
You can also directly assign these permission groups to existing users from the Associated Users tab.

Users:
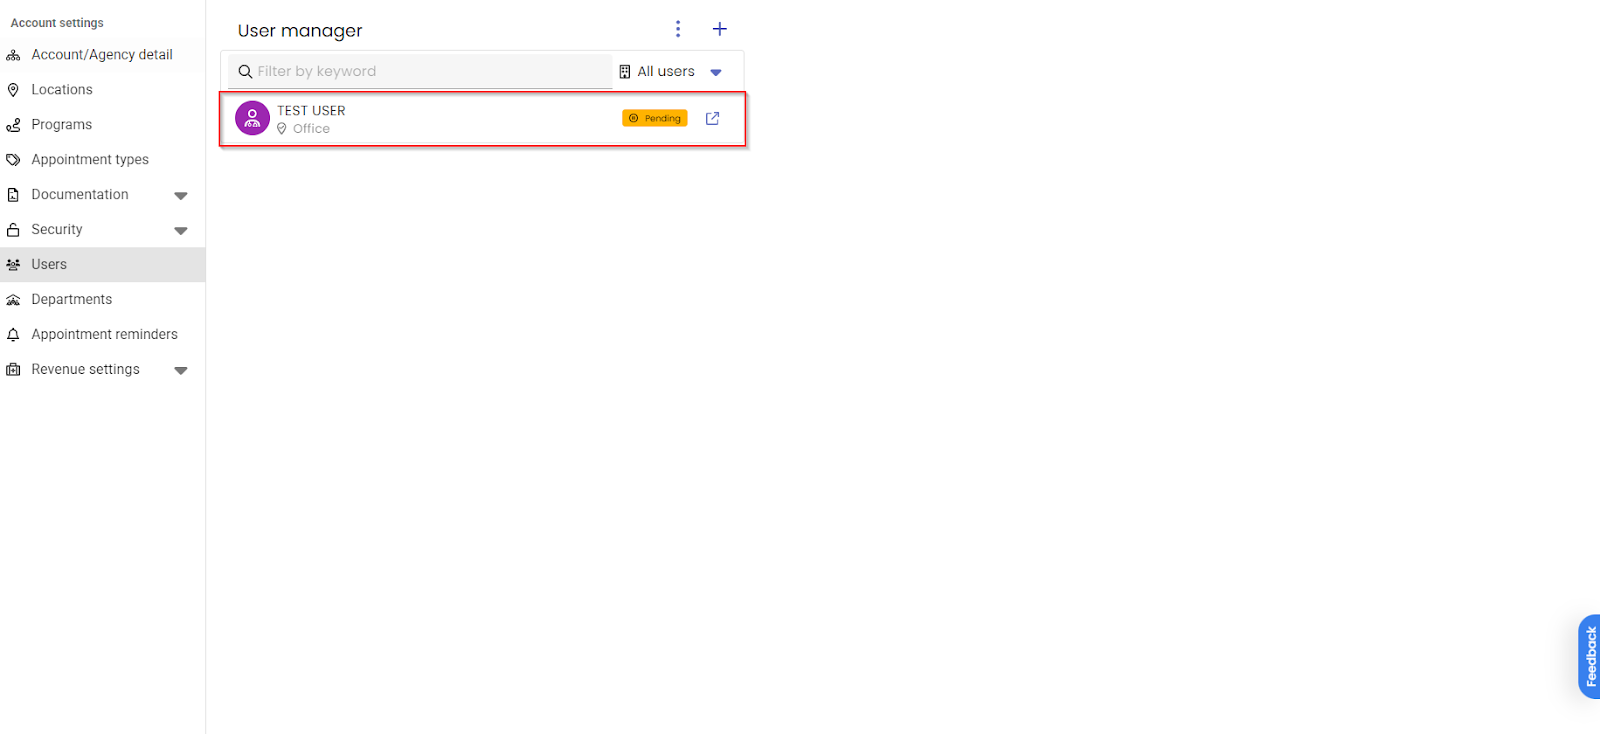
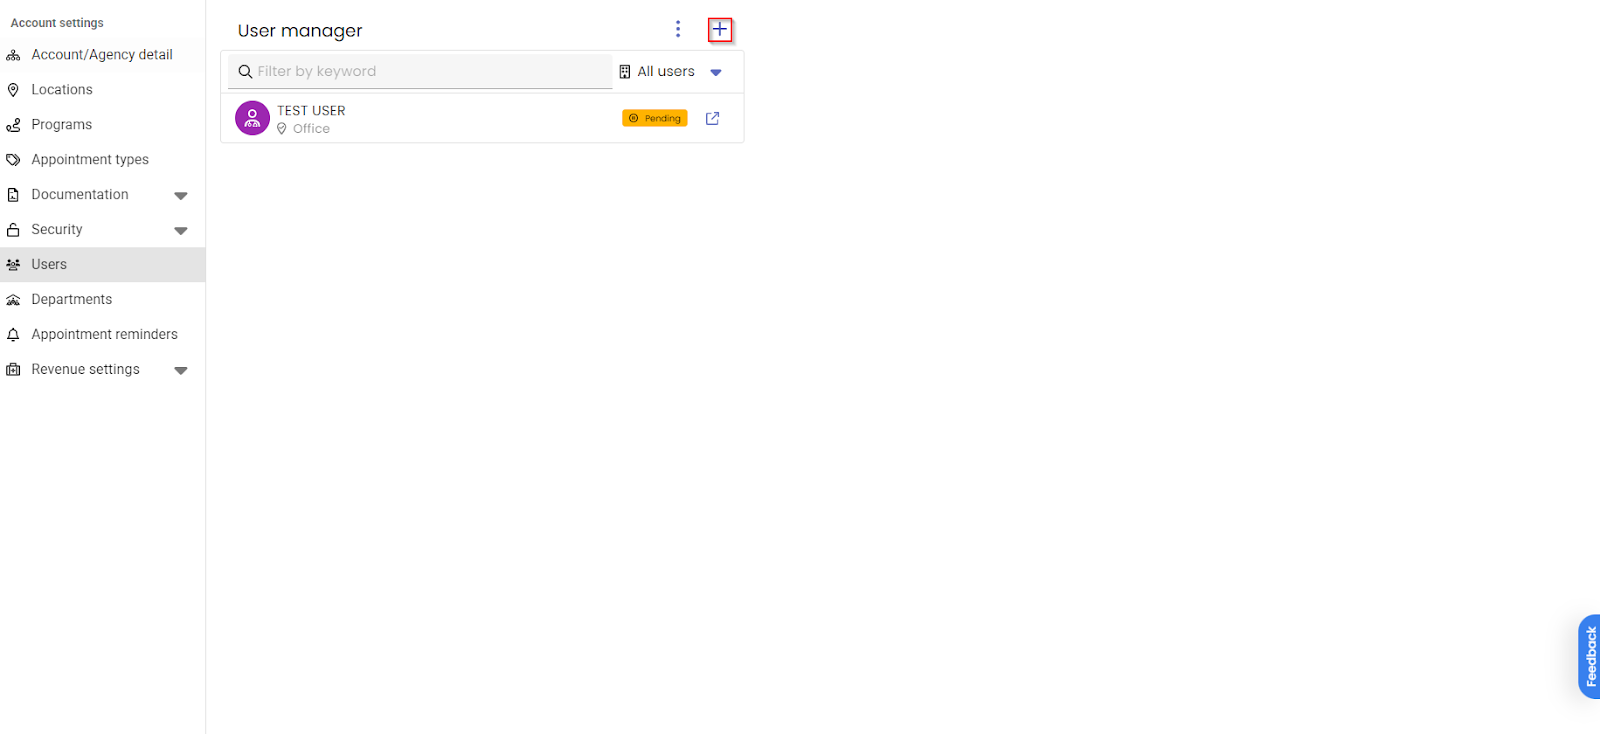
The Users tab will allow you to create and manage users in your database.
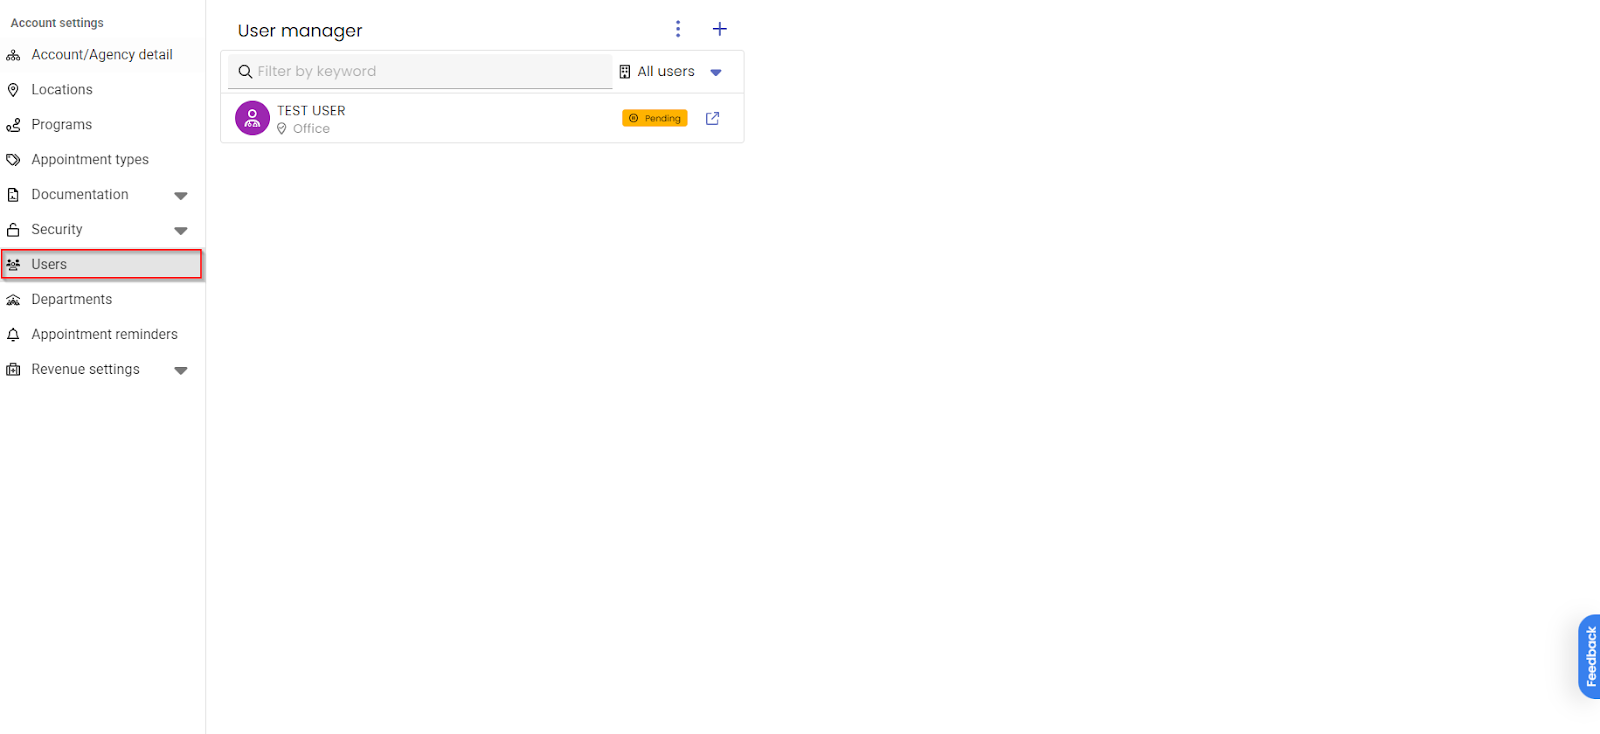
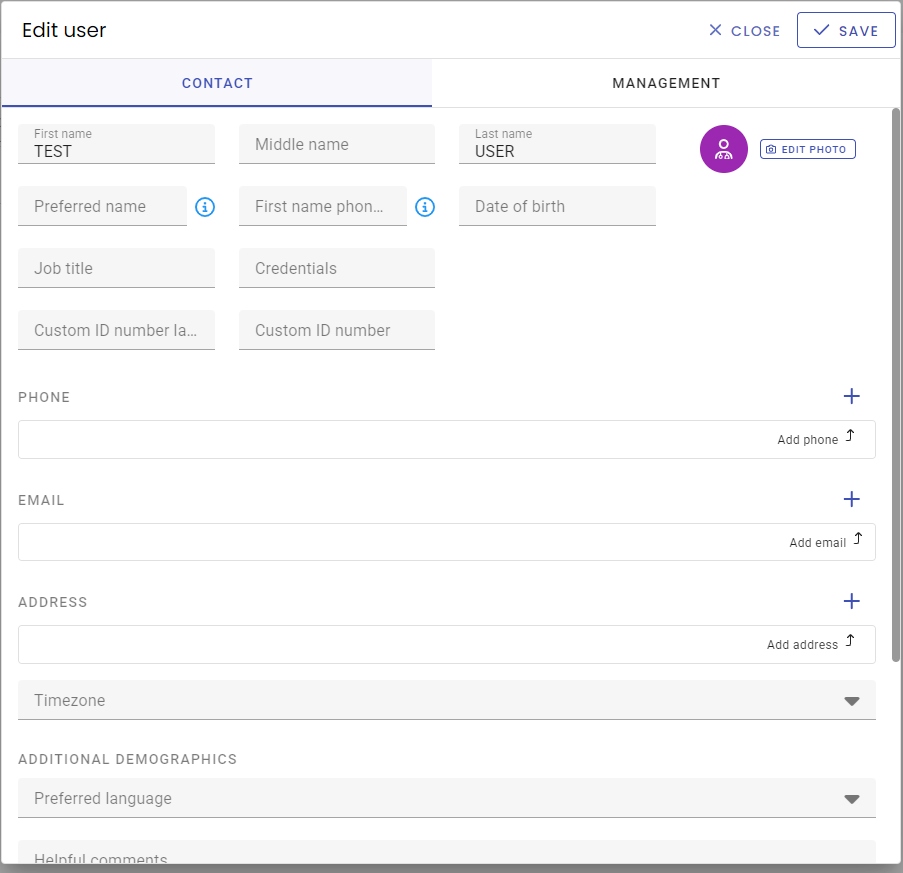
To edit an existing user, select their name to access their contact and management settings.
In the Contact tab, add or edit information such as the user's job title, credentials, contact details, and further demographic information
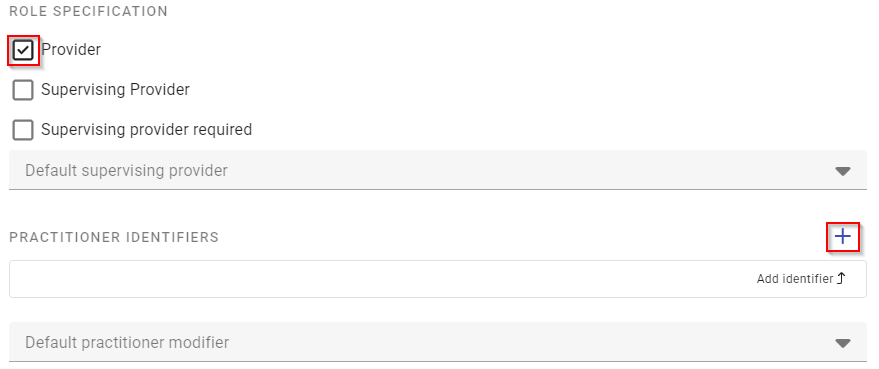
At the bottom of the Contact tab, selecting the Provider checkbox will allow you to enter practitioner identifiers such as Nation Provider Identifier. In this bottom portion, you can also mark a provider as a supervisor or assign a supervisor to this user.
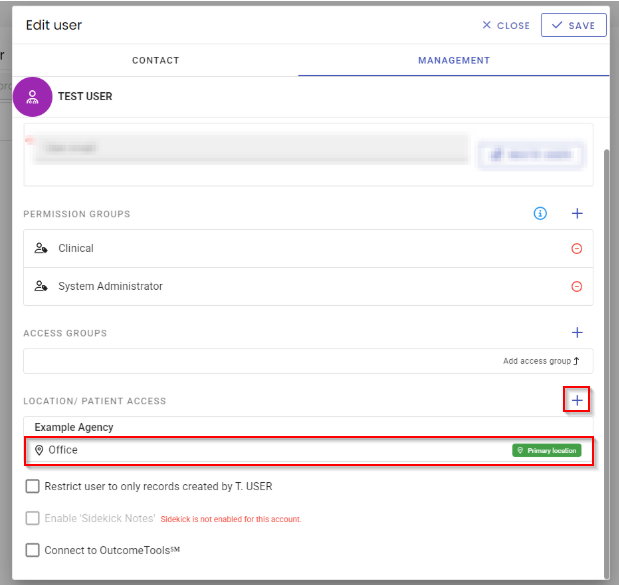
In the Management tab of the Edit user window, you can assign or remove Permission Groups. A user can have more than one permission group and these groups will dictate what this user is allowed to do in your database.
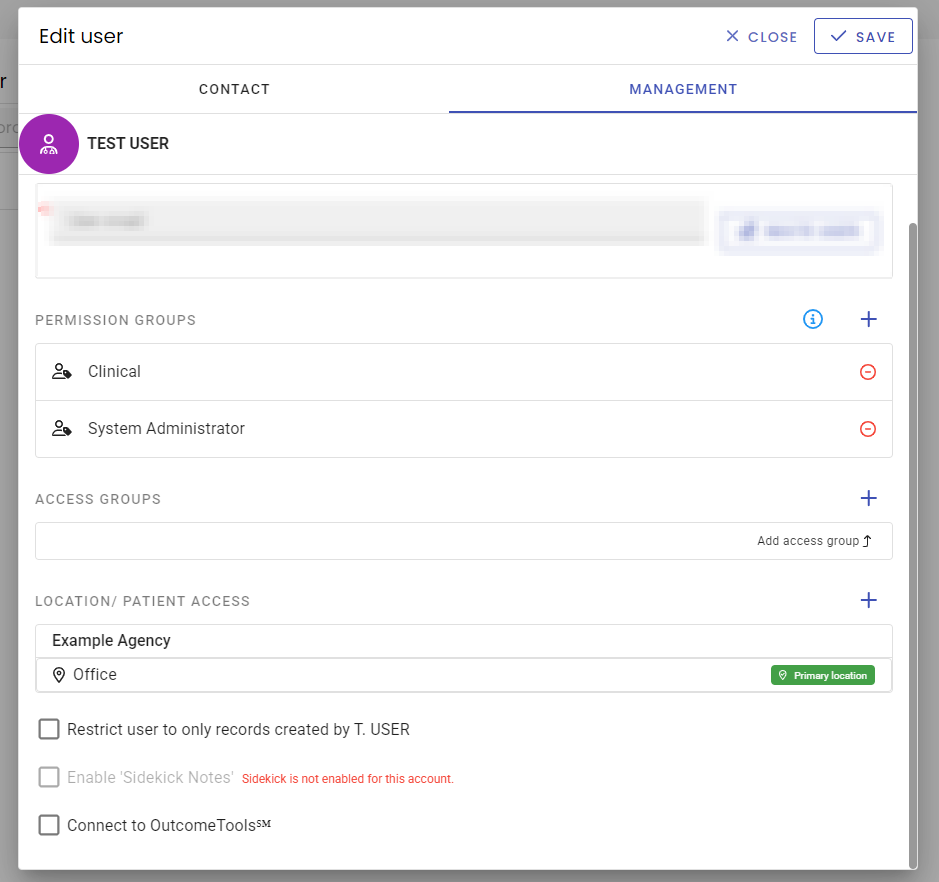
Location/patient access determines what locations and types of patients the user has access to. To assign access, click the plus icon and choose a location or select an already existing location from the list to edit it.
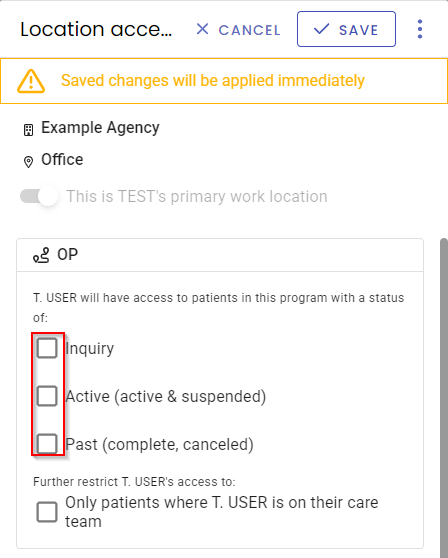
Once a Location is chosen, assign the patient types the user can access for each Program. The patients are separated into Inquiry, Active, or Past to allow restriction of specific statuses.
Once Location and Patient access is determined and saved, the management tab of the user screen will show the access that has been given based on the location, program, and status.

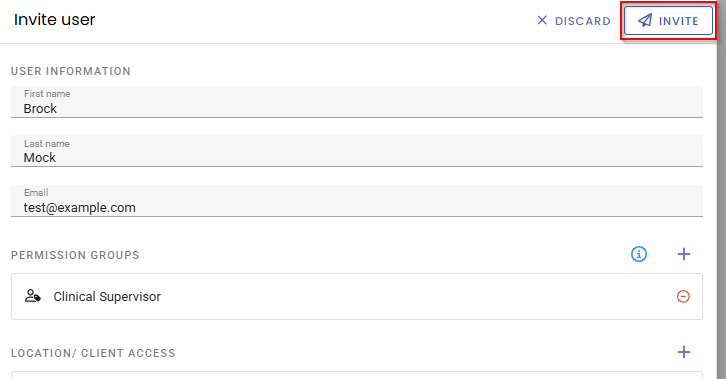
To create a new user, begin by selecting the Plus Icon.
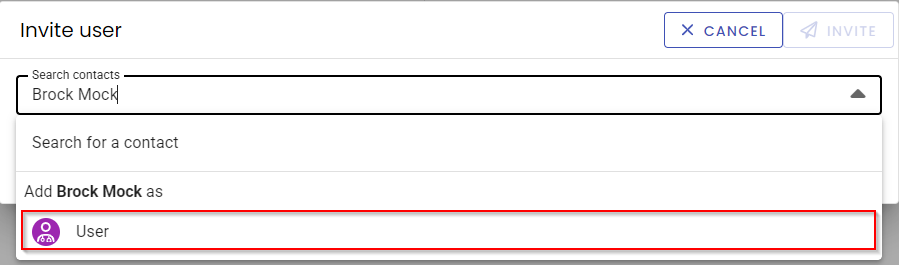
Enter the name of the user you wish to create and select User.
Add your desired Permission Groups and approve Location/Patient access before selecting Invite from the top right corner to send the user an email to finalize their account creation by creating their own unique password to gain access.
To inactivate a user go to Settings > Users > Select the users name > Select the Management tab > Select the 3 dots > Select Inactivate > select Save.

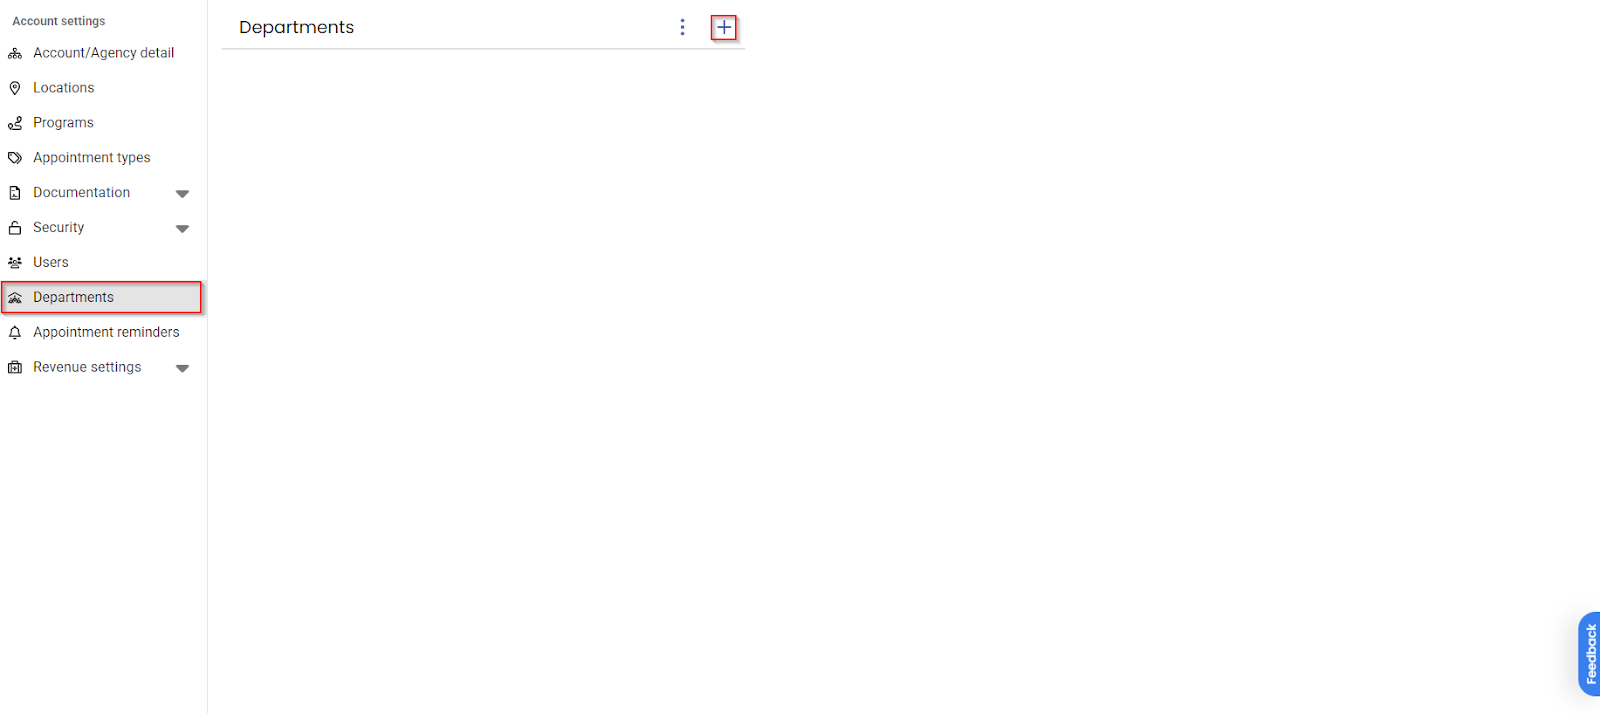
Departments:
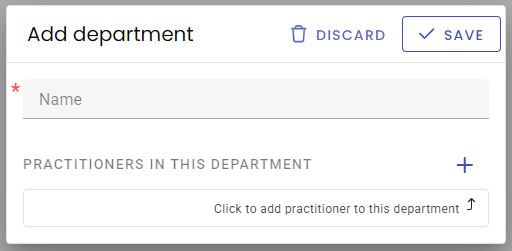
The Departments tab allows you to create and manage care teams such as Nursing, Clinical, or Case Management. Creating departments helps track provider responsibilities within the database. To create a new department, select the plus icon.
When creating a care team department, you can assign which practitioners will be listed in this department. As practitioners complete assessments, they can indicate which teams are responsible for portions of the patient's care.
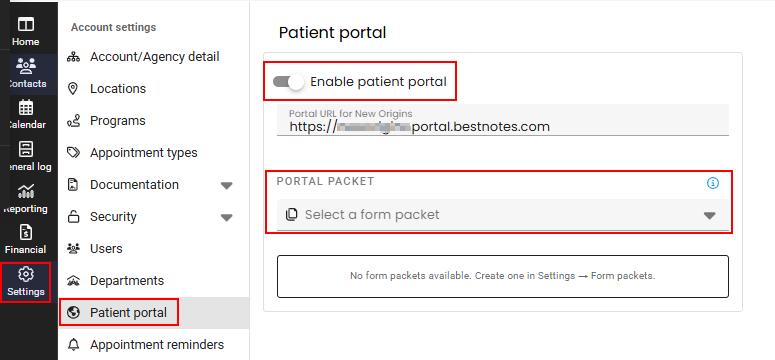
Patient Portal:
To enable the Patient Portal go to Settings>Patient portal>toggle on the Enable patient portal. If you create a Form Packet within the Documentation settings, you can add a packet below (for example, “Welcome Packet” or “Admission Consent Forms”)
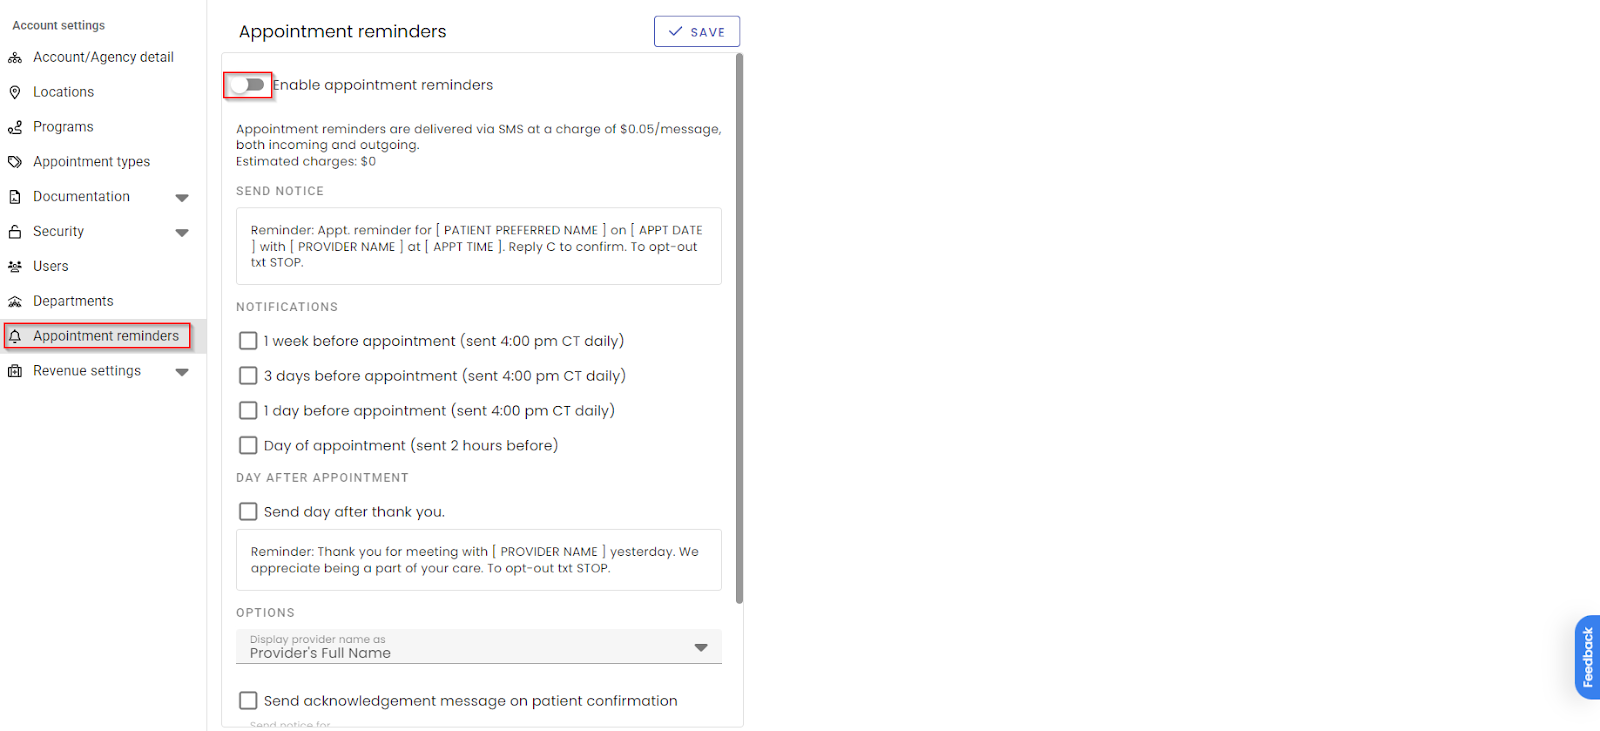
Appointment Reminders:
In the Appointment Reminders tab, you can enable reminders to be sent via text messaging. When enabled, this feature will cost 5 cents per text, incoming and outgoing. You can also customize how often these reminders will be sent.
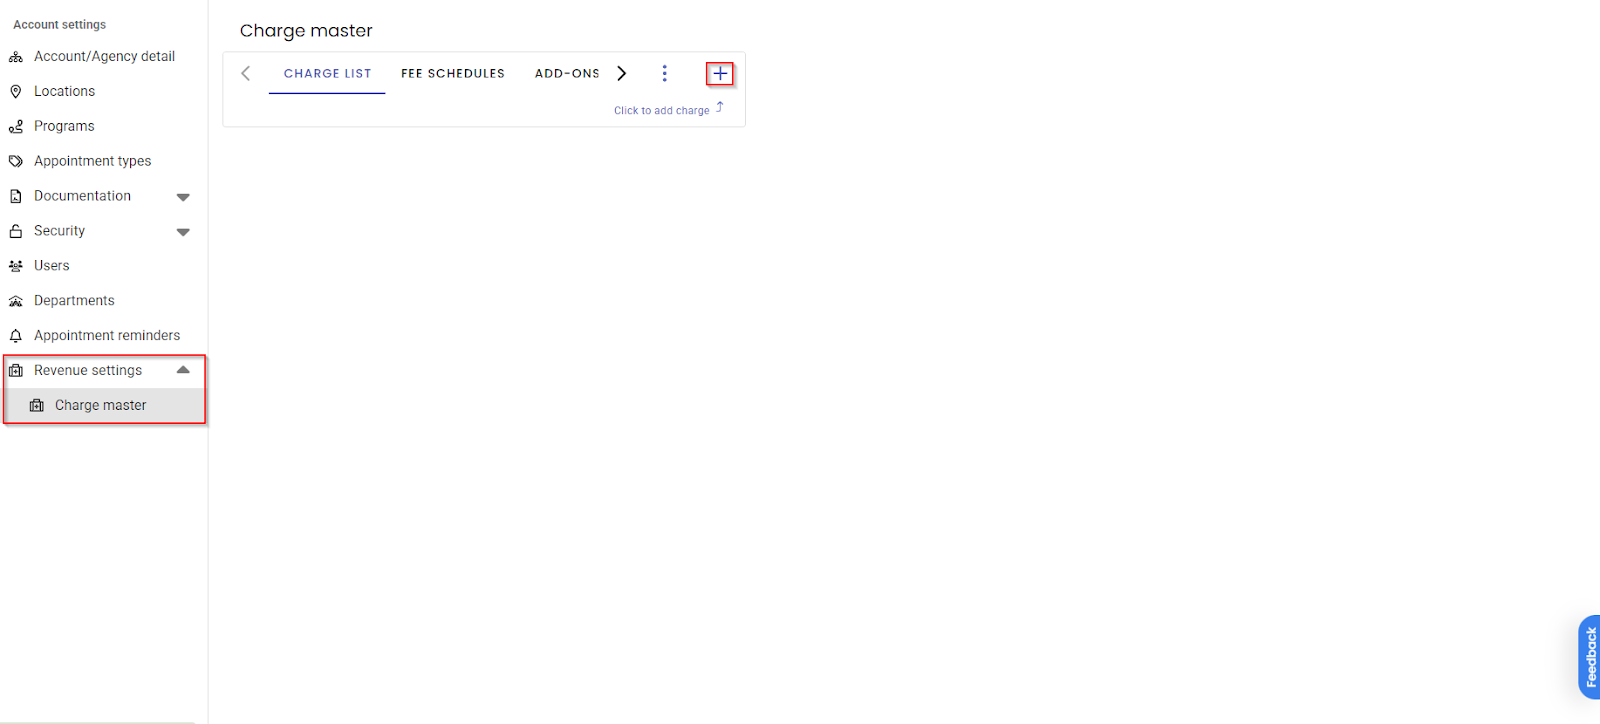
Revenue settings:
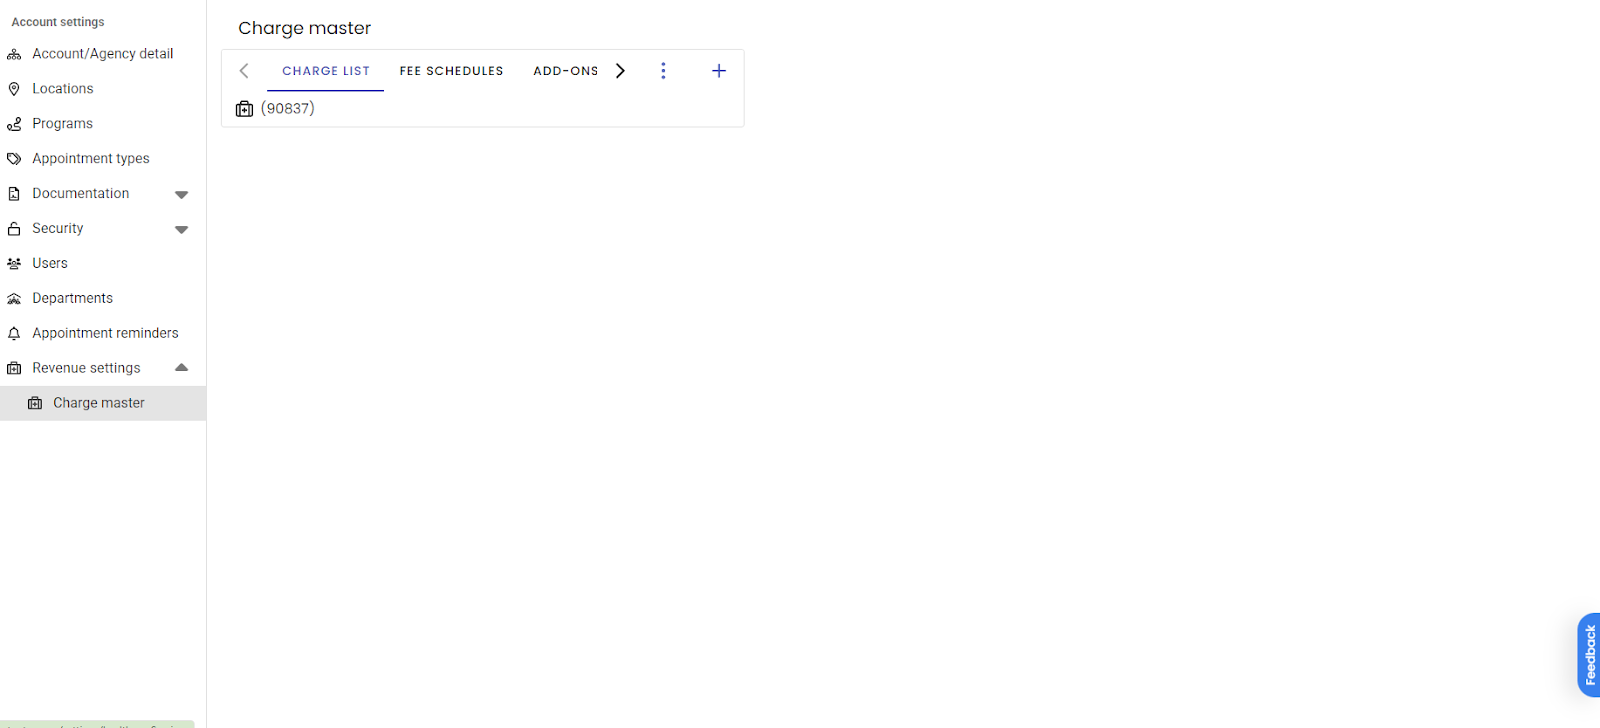
In the Revenue Settings tab, the Charge Master is where you can add your procedure codes to help manage billing. To add a procedure code, select the Plus icon.
Charge master:
Next, add the procedure title and standard procedure code. Once the title and code have been entered, you can also specify the procedure length, rates, authorizations and add modifiers or add-ons.
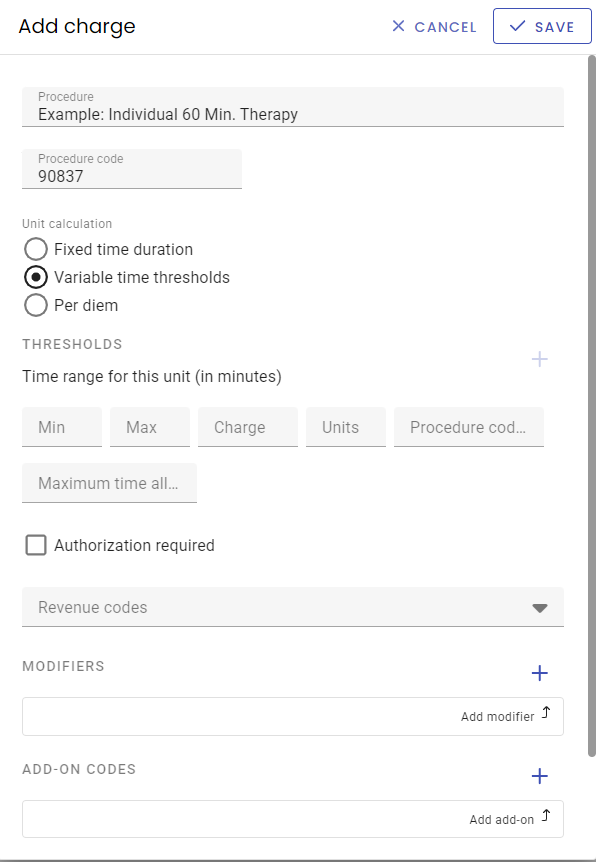
Once your procedure codes are added, they will appear in your charge list. In the Charge Master you can also enter fee-schedules and add-on codes.